Portainer + Traefik Integration
Launch your Docker infrastructure effortlessly with TryDirect
About this deployment
At TryDirect, we provide a fully managed Portainer + Traefik integration, so you can deploy, monitor, and route multiple Docker services without any hassle. Forget manual configuration, everything comes ready to run.
- Portainer: A visual interface that makes managing Docker containers, images, networks, and volumes simple.
- Traefik: Automatically routes HTTP/HTTPS traffic to the right container based on your domains, with built-in SSL support via Let’s Encrypt.
With our deployment, you can launch staging, production, or client projects in minutes.
Who benefits
- Solo developers & freelancers: Quickly deploy client projects or side apps.
- Agencies & small teams: Standardize deployments, reduce setup errors, and scale projects seamlessly.
- DevOps engineers & managed service providers: Provide clients with a stable, visual Docker environment.
- Startups & MVPs: Get production-ready infrastructure without hiring a full DevOps team.
Why you pay for this deployment
You are not paying for Portainer or Traefik themselves - they are open-source. You are paying for the ready-made, production-tested deployment that saves time, reduces errors, and simplifies operations.
With TryDirect, you pay for:
- Instant deployment: Skip hours of manual setup.
- Automation & best practices: Includes ready-to-use Docker Compose configuration and SSL setup.
- Stability & reliability: Tested templates minimize downtime and configuration mistakes.
- Documentation & guidance: Clear instructions for DNS, routing, and scaling services.
- Repeatability: Easily recreate the same environment for multiple projects or clients.
At TryDirect, we make sure you get production-ready Docker infrastructure in minutes, not hours.
How to deploy Traefik + Portainer stack
Let’s see how it works. For example, we want a basic WordPress site on a Hetzner Cloud powered by Portainer.
1. Find Portainer + Traefik stack
Go to https://try.direct/applications and type in “Portainer + Traefik” in the search field. Click the item
2. Select Hetzner Cloud from the “Deploy To” button
Select Hetzner Cloud from the dropdown list and click it.
3. Enter the domain name that you own
Type your domain name, for example, “mydomain.com” into the * BASE DOMAIN NAME text field.
4. Choose the VPS server
Let’s choose CX21, a 4Gb RAM server that should be enough for all three applications. We recommend choosing the CX21 server, which has 4GB of RAM and should be sufficient for all three applications.
It's important to keep in mind that adding more applications to the stack may require additional server resources, and overloading the server can lead to slowdowns or even server downtime. Please use your discretion when adding new applications to the server.
5. Deploy
Enter your personal API key and click “Deploy”. You can see the created server in your Hetzner account.
6. Configure DNS
Once you receive a notification email confirming that the deployment is complete, you should go to your domain registrar's website and locate your domain. From there, you need to configure the 'A' record to point to your new server IP address. Additionally, you should add a "CNAME" record for the wildcard subdomain. In this case, the wildcard should be *.mydomain.com. This will ensure that all subdomains are directed to your new server.
7. Deploy NGINX and WordPress
Open https://portainer.<yourdomain> subdomain. In our case, it’s "https://portainer.mydomain.com" in your browser, and create an admin account in Portainer.
If you see a message saying:
Your Portainer instance timed out for security purposes. To re-enable your Portainer instance, you will need to restart Portainer.
You should:
1. Log in to your server using SSH (find connection details in the PDF)
2. cd /root/portainer_traefik
3. Execute the command
docker compose up -d --force-recreate portainerbash
Go back to your browser and refresh the page. Once you log into the app, next:
1. Click "Home" in the left navigation menu
2. Find "Local" environment and click it
3. Find “App templates” in the left navigation menu and click it
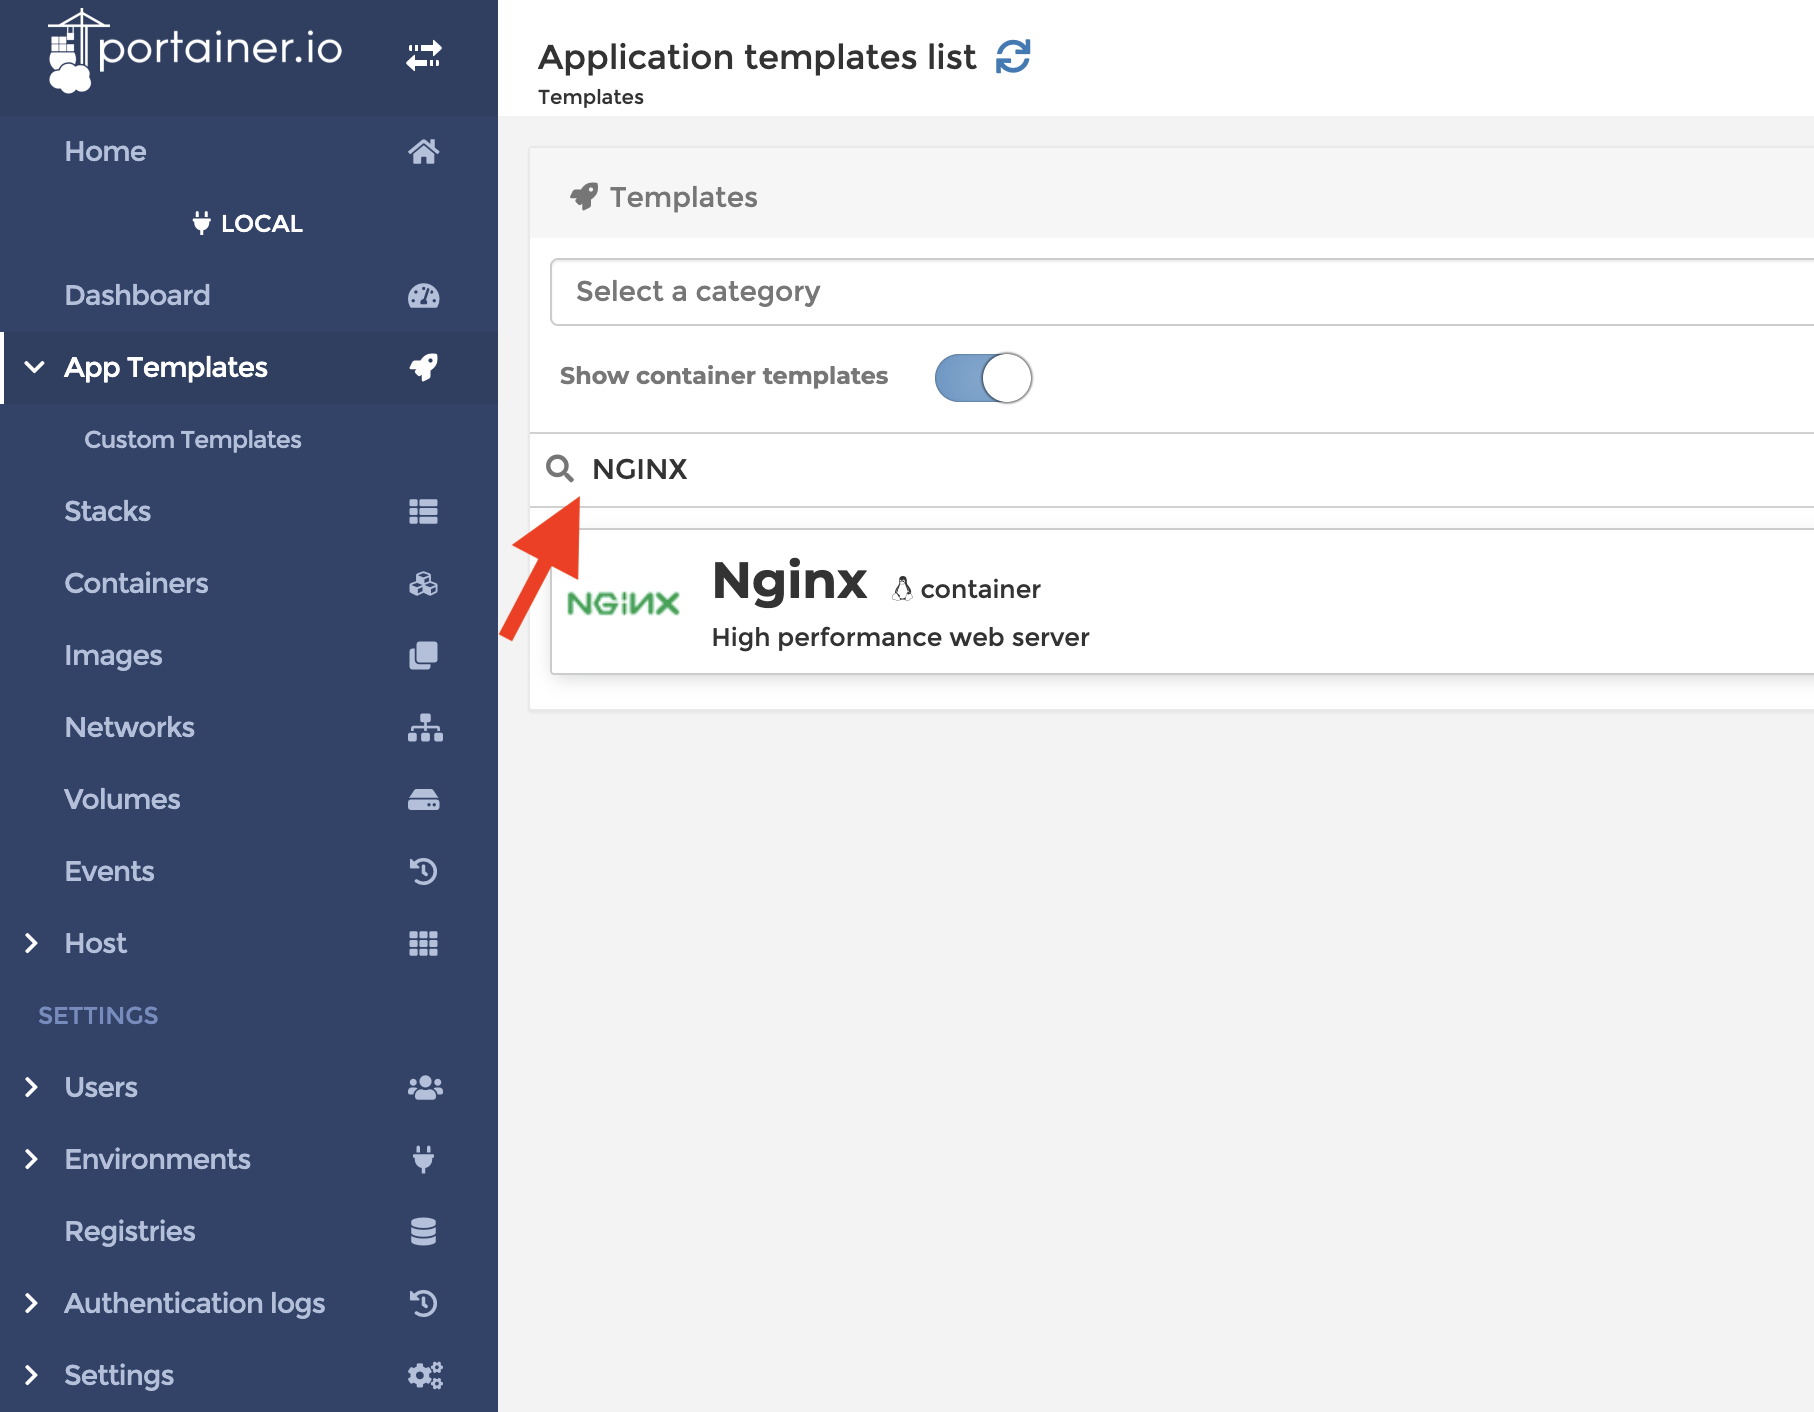
4. Type “NGINX” in the search field

Search NGINX application template
Click Nginx and then click the “Deploy the stack” button.
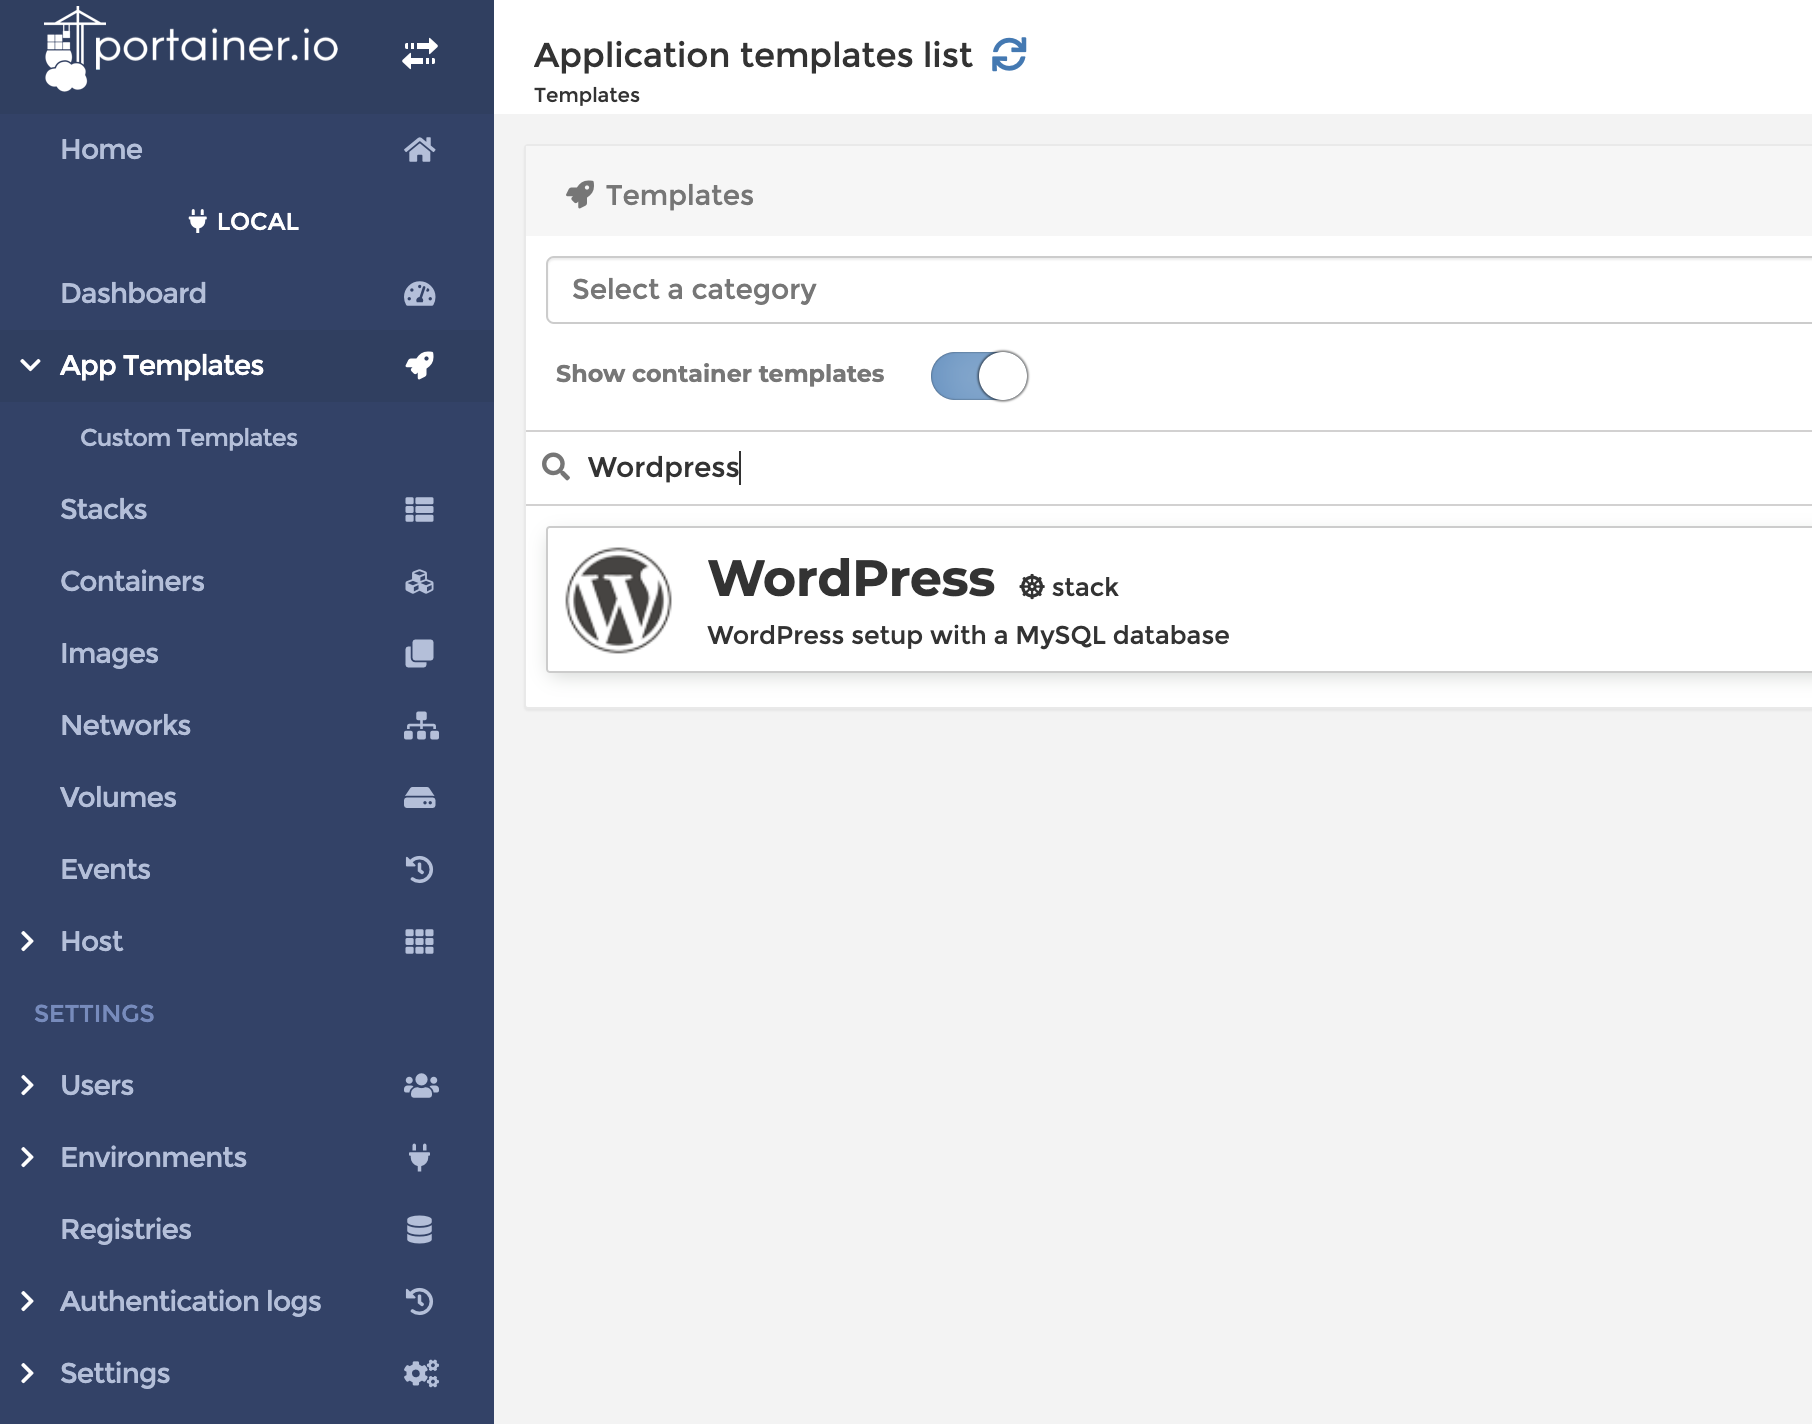
Find WordPress and do the same.

Fill in all required fields and click “Deploy the stack”.
Find “Containers” in the left menu and click “traefik” from the container list.

8. Add Traefik labels for Nginx and WordPress services
1. Click Nginx container
2. Click "Duplicate/Edit" button from the "Actions" section
3. Find the “+ advanced mode” link on the same form and click it.
4. Find Labels section, you should see something like on the screenshot below:

First, we have to add common labels. You can copy the network name from the “Network” dropdown in the same form. It should be something like this: portainer_traefik_default-network
Click the “+ add label” button and enter the first pair of key/value.
labels:
- "traefik.enable = true"   // enable traefik for app
- "traefik.docker.network = portainer_traefik_default-network"
Each additional service should be “labeled”. Each service should have a set of at least four values. Here is a template:
labels:
- "traefik.http.routers.service.entrypoints = sweb"   // Entrypoint for your app
- "traefik.http.routers.service1.rule = Host(`service1.mydomain.com`)"
- "traefik.http.routers.service1.service = service1"
- "traefik.http.services.service1.loadbalancer.server.port = <port>"
YAML
So for Nginx, it will be:

traefik.enable                                        | true
traefik.docker.network                                | portainer_traefik_default-network
traefik.http.routers.nginx.entrypoints                | sweb
traefik.http.routers.nginx.rule                       | Host(`mydomain.com`)
traefik.http.routers.nginx.service                    | nginx
traefik.http.services.nginx.loadbalancer.server.port  | 80
YAML
Click the "Deploy the container" button from the section above, after all labels are added.
Go to the "Network" tab and make sure "portainer_traefik_default-network" is selected by default.
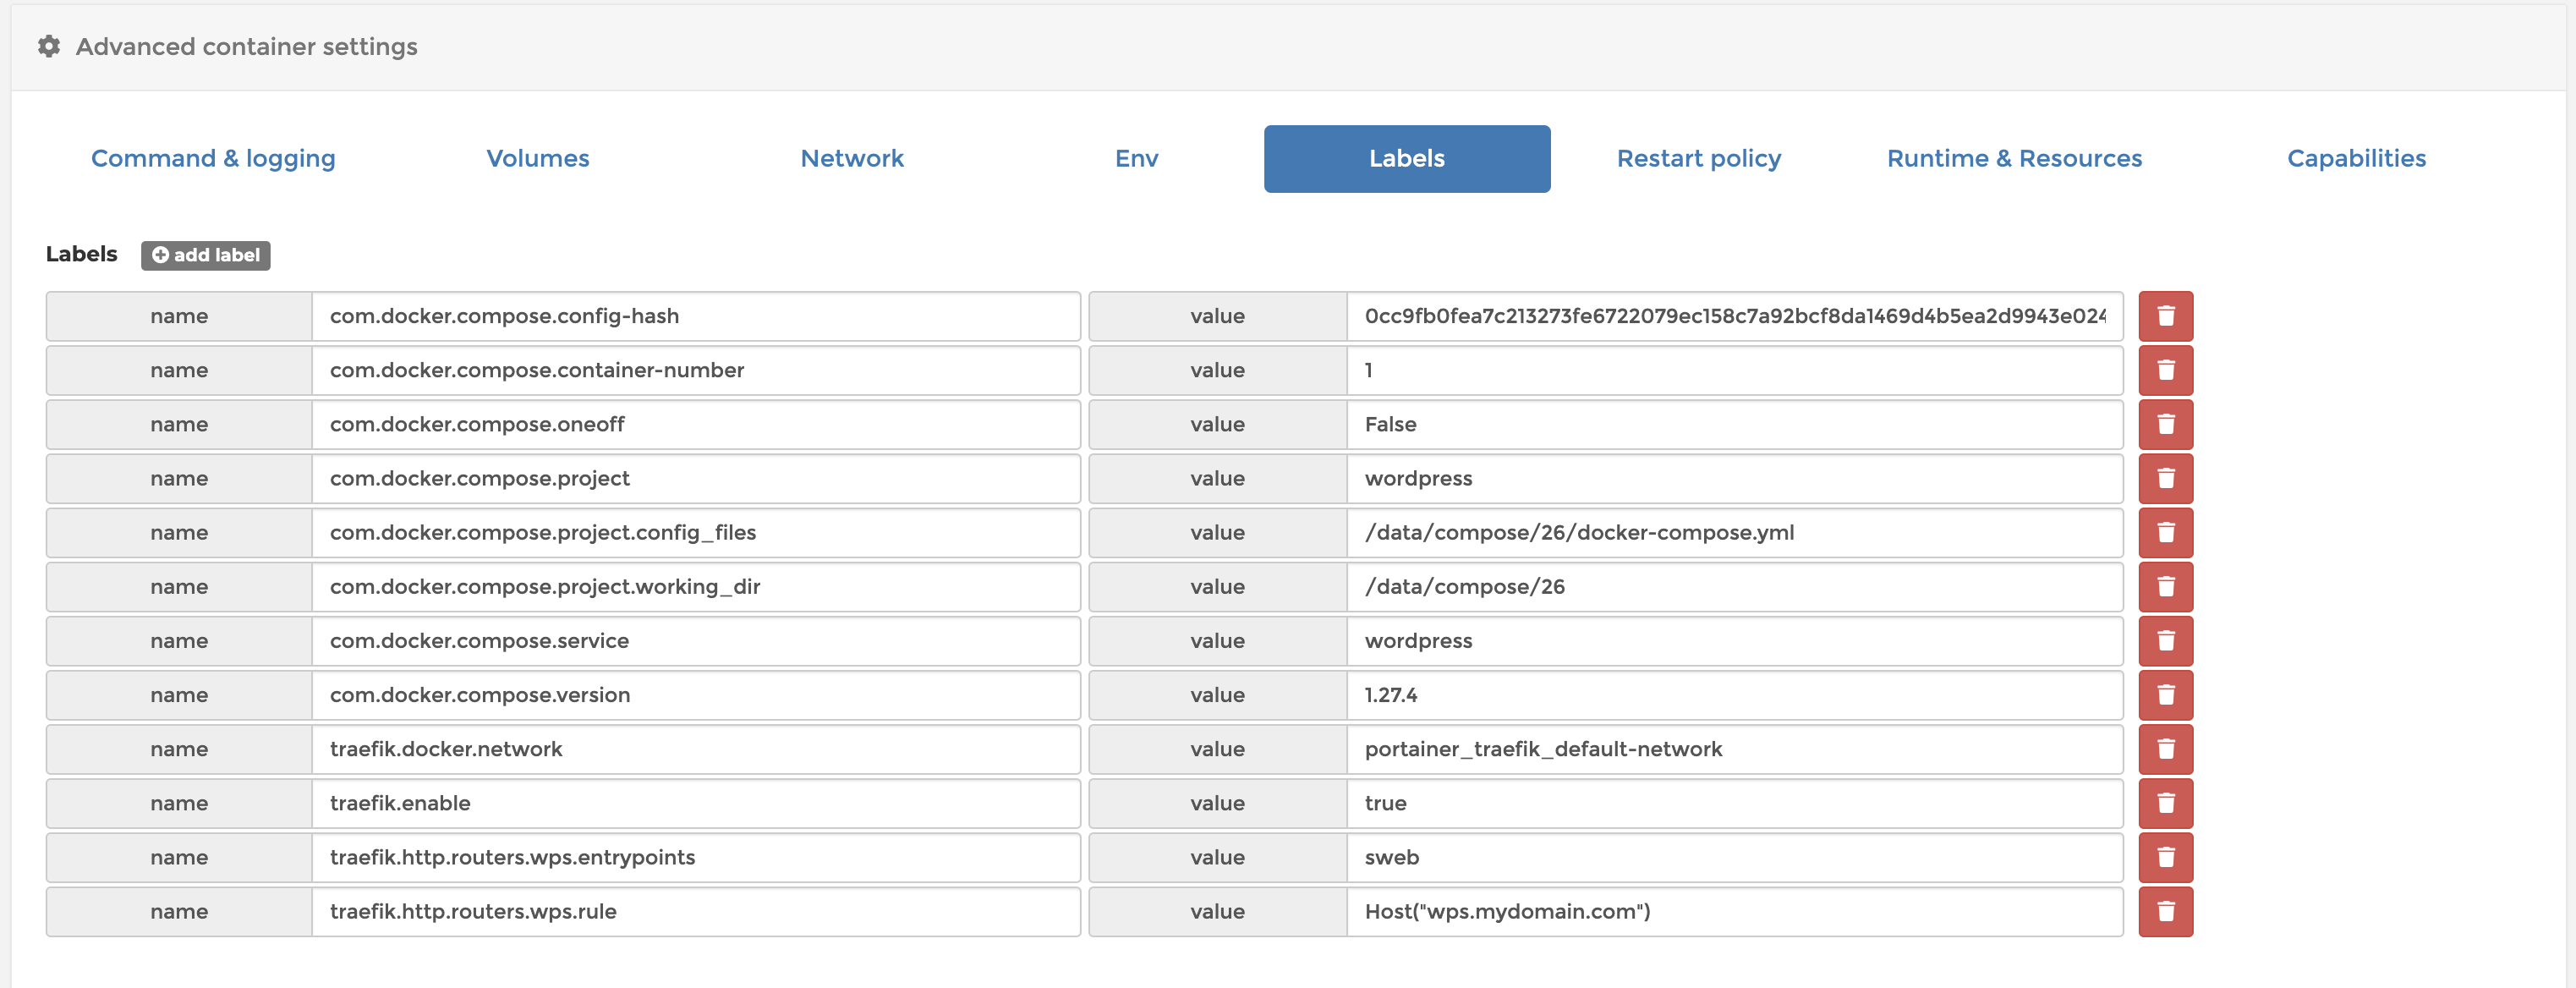
Let’s give the WordPress service a short name like “wps”. Labels would look like those from the following screenshot:

traefik.enable                                     | true
traefik.docker.network                             | portainer_traefik_default-network
traefik.http.routers.wps.entrypoints               | sweb
traefik.http.routers.wps.service                   | wps
traefik.http.routers.wps.rule                      | Host(`wps.mydomain.com`)
traefik.http.services.wps.loadbalancer.server.port | 80
YAML
In the 'traefik.http.routers.rule' value field, instead of "wps.mydomain.com" you can set your base domain like "mydomain.com", to have WordPress accessible on the base domain.
Go to "Network" tab and make sure "portainer_traefik_default-network" is selected by default.
Important! The WordPress container should be connected to both networks "portainer_traefik_default-network" as external and "mystack_default" as internal where the WordPress Database container is connected.
Once, all the labels and network are configured, click the "Deploy the container" button from the form above. Now, we can check all the services in the browser.
Portainer: https://portainer.mydomain.com
Traefik: https://traefik.mydomain.com
WordPress: https://wps.mydomain.com
WordPress (at base domain): https://mydomain.com
Nginx: https://nginx.mydomain.com/
Note: Nginx is added as an example of a second application that can work along with WordPress.
Need Help? Ask in Discord, Telegram, or leave a message here
Companion apps
Fail2ban scans log files and bans IPs that show the malicious signs. Highly recommended for simple VPS server setup
Get DevOps Support Hourly
By selecting this service, you will have priority access to the development team for optimizing and upgrading your stack.
Contact info@try.direct for more information or Hire an expert directly to make post-installation adjustments on an hourly basis. Browse other available services.

